High-Density Polyethylene (HDPE) has become the gold standard for modern wet utilities, potable water distribution, and heavy industrial piping systems. Renowned for its flexibility, corrosion resistance, high tensile strength, and long service life, HDPE piping relies heavily on precise execution during site installation and jointing.
To achieve a completely leak-free, monolithic piping system, joining HDPE pipes through electrofusion welding requires rigorous quality standards, specialist tools, and strict adherence to engineering protocols.
Phase 1: Pre-Installation & Site Preparation
Before any pipe joining or trenching begins, thorough site planning and material inspections are essential to ensure structural integrity and regulatory compliance.
1. Material Handling & Inspection
- Inspection: Pipes, fittings, and electrofusion sockets must be checked for gouges, deep scratches, UV degradation, or out-of-round deformation. Any pipe with scratches exceeding 10% of the wall thickness must be rejected.
- Storage: HDPE pipes should be supported evenly on flat ground and protected from extreme ambient heat and direct sunlight prior to installation.
2. Trench Excavation & Bedding
As a certified Infrastructure Contracting Company, trench preparation must follow precise structural specifications:
- Trench Width: The trench must be wide enough to allow safe pipe placement, proper alignment, and sufficient room for welding equipment (typically pipe diameter plus $300\text{ to }400\text{ mm}$).
- Bedding Material: A clean, compacted layer of graded sand or fine gravel ($100\text{ to }150\text{ mm}$ thick) is prepared at the trench bottom to prevent sharp stones from damaging the pipe exterior.
Phase 2: The Electrofusion Welding Process
Electrofusion welding uses specialized fittings built with embedded electric heating coils. When an automated welding unit applies an electric current, the coils melt the surrounding HDPE plastic on both the fitting and pipe surface, fusing them into a single continuous piece.
Step 1: Cutting and Squaring Pipe Ends
The pipe ends are cut strictly perpendicular to the pipe axis using rotational pipe cutters. Burrs, plastic shavings, and rough edges are completely deburred to allow seamless fitting insertion.
Step 2: Mechanical Scraping (Oxidation Removal)
Polyethylene forms a microscopic surface oxide layer when exposed to air. If not removed, this layer causes weak fusion joints and catastrophic joint failure.
- Using a rotary scraping tool, the outer pipe surface is mechanically scraped across the entire insertion depth plus an extra 10 to 20 mm.
- The scraper removes a uniform layer approximately 0.2 to 0.3 mm thick.
Step 3: Cleaning & Alignment Clamping
- Cleaning: Scraped areas and internal fitting surfaces are thoroughly cleaned using 90%+ isopropyl alcohol wipes to eliminate dust, grease, moisture, or fingerprints. Once cleaned, the fusion zones must not be touched.
- Insertion & Marking: Insertion depth is measured and clearly marked on the pipe end.
- Clamping: The pipe and fitting are secured in mechanical alignment clamps. Clamping prevents movement during expansion/cooling and eliminates mechanical stress on the molten joint.
Step 4: Fusion Cycle Execution
- The smart electrofusion machine is connected to the fitting terminals.
- Joint parameters are entered either via a barcode scanner on the fitting or manual input (voltage, fusion time, and ambient temperature compensation).
- The welding unit delivers a controlled electrical current, heating the internal coils and melting the HDPE interfaces. Pop-up melt indicators on the fitting visually confirm that fusion pressure was achieved.
Step 5: Enforced Cooling Period
The welded joint must remain locked in its alignment clamps completely undisturbed during the specified cooling cycle. Applying mechanical force, pressure testing, or movement before the joint cools back to ambient temperature will ruin the joint integrity.
Phase 3: Post-Welding Testing & Commissioning
Once pipeline installation and jointing are complete, an experienced Water Pipeline Contractor conducts rigorous quality assurance testing prior to final backfilling and authority handover.
1. Hydrostatic Pressure Testing
- The pipeline section is capped, isolated, and filled with clean water, ensuring all air is purged through high-point air release valves.
- As part of Potable Water Contractor testing standards, the line is pressurized to 1.5 times the maximum design operating pressure and held for a specified duration to verify zero pressure drop and zero leak occurrence.
2. Disinfection & Chlorination
For potable water transmission, the line is disinfected using a chlorine solution, thoroughly flushed, and sampled for biological water quality approval by relevant municipal and utility authorities.
3. Final Trench Backfilling
After successful pressure testing:
- Side-fill and primary backfill (fine sand/gravel) are placed in layers ($150\text{ mm}$) and compacted around the pipe profile.
- A bright utility warning tape (with tracer wire for non-metallic pipe locator systems) is laid above the pipe zone before final soil backfilling and surface reinstatement.
Partnering with Expertise
Executing complex HDPE Pipeline Installation projects demands specialized machinery, certified electrofusion technicians, and complete technical compliance. Engaging a trusted Utility Infrastructure Contractor like Jordanor Contracting Company (JCC Gulf) guarantees that every joint, pipeline section, and testing protocol adheres to the highest engineering and safety standards.
Choose an image
Featured Article

For years, the default expectation after Class 12, especially for science students has been simple: clear JEE for engineering or clear NEET for medicine. If you didn't fit into those two boxes, it often felt like you were out of options. How to Choose the Right Path.
That narrative is completely outdated. Read More

What if the world's largest river wasn't on the ground?
When people think of the Amazon, they imagine a vast jungle filled with exotic wildlife, giant trees, and the mighty Amazon River. But scientists have discovered something even more astonishing hidden above the forest. A massive invisible rivers flowing through the sky. Read More

বৃক্ষছায়ায় জ্ঞানের আলোকবর্তিকা: প্রাচীন ভারতীয় শিক্ষা দর্শনের গূঢ়তত্ত্ব Read More
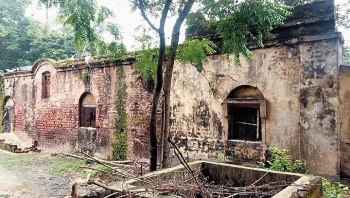
A brief overview of the village where Batukeshwar Dutt was born, its historical significance and how to visit. Read More

অনেক বছর ধরে প্রচলিত একটি ধারণা মানুষ তার মস্তিষ্কের মাত্র ১০% ব্যবহার করে। আধুনিক স্নায়ুবিজ্ঞান বলছে, এটি সম্পূর্ণ ভুল। আমরা আসলে আমাদের মস্তিষ্কের প্রায় সব অংশই ব্যবহার করি, শুধু একসঙ্গে নয়। প্রতিটি অঞ্চল নির্দিষ্ট কাজের জন্য দায়ী, কোনো অংশ ভাষা বোঝে, কোনো অংশ পরিকল্পনা করে, আবার অন্য অংশ আবেগ বা চলাফেরার নিয়ন্ত্রণে থাকে। Read More